Triangulation of complex brushes
Complex Triangulation means that any type of brush will now be triangulated, if wished or if necessary. A complex brush will be turned into many spike brushes, usually one or 2 per original face. This can lead to a very high brush count and will also usually require the brush coordinates to be rounded, since map editors might have trouble with brushes like that (Hammer does), that have floating point coordinates.
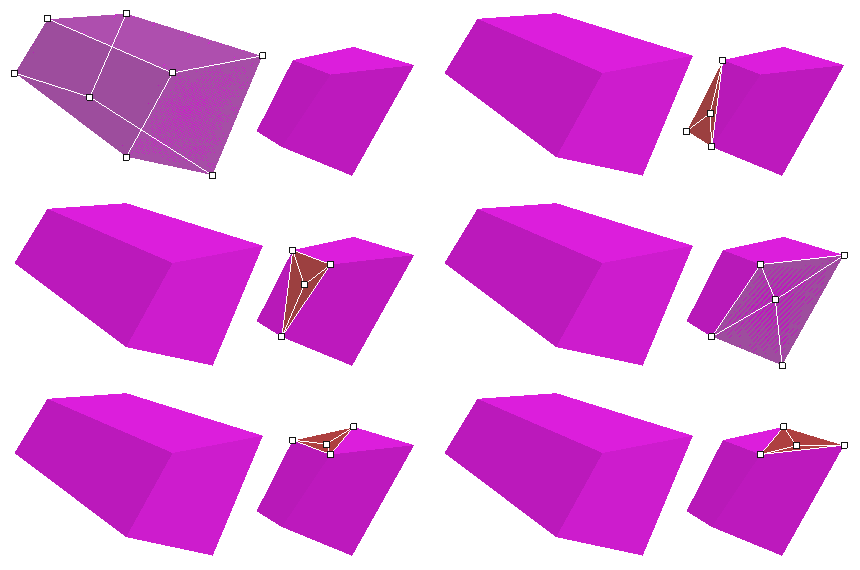
Even without activating triangulation (“tri 1”), the program will triangulate brushes, based on the situation and brush type (see below).
Generating ramps for example, will always activate triangulation, but also rounding coordinates will do so, because brushes would otherwise become invalid and impossible to be loaded in an Editor without brush destruction.
Brush types for triangulation
| Type | Restrictions | Face Count | resulting Brushes |
|---|---|---|---|
| Triangle | one upright back or front face | 5 | 2 |
| Trapezoid | 2 upright front and back faces | 6 | 2 |
| Complex | none | 5+ | 1-2 per face minimum |
Simple triangulation of a Trapezoid
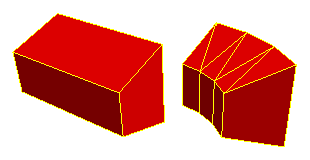 Simple triangulation is more efficient performance-wise and occupies less space on the harddrive (less brushes). It also causes less faulty behaviour during compilation, but can just as well cause problems, too. This can be compensated by rounding coordinates of triangulated brushes.
New Shift Mode: Per Group Texture
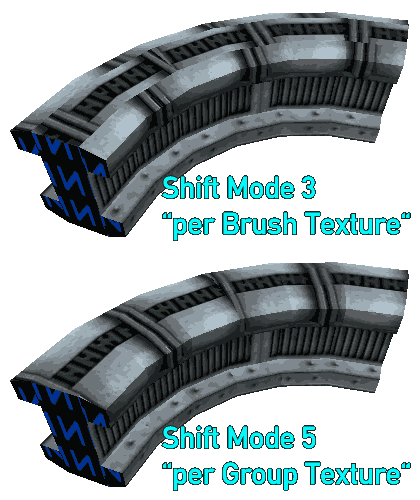 The shift mode “Per Group Texture” was overdue from the beginning, but I kept pushing it along. Now brush textures of solid entities that consist of more than one brush, will be textured correctly, always respecting all brushes of that entity, when calculating the horizontal texture shift.
Custom File Paths and File Append
It is now possible to determine custom file paths for source, target and path files (path files = map files with actual corner_path’s in them).
target C:\Folder\curvy_pipe.map” destination map file path
path C:\Folder\pipe_path.map path-map file path
Relative paths
Paths can also be relative ofc, depending on the location of the Map2Curve.exe file.
Folder names with spaces in them
Note: When containing spaces, the path has to be put into quotation marks:
target “C:\My Folder\pipework.map” custom path with spaces
Append to existing files
With “append” a newly generated file can be appended to an existing map file. The original content will be obtained.
Transformations (Scale, Rot, Move)
With transformations it is now possible to transform both source object and the final generated object in different ways.
Transformation details
| Type | Applies to | Input Type | Input Values | Axes | Origin |
|---|---|---|---|---|---|
| scale | Final | Float | 1 | x y z | (0 0 0) |
| scale_src | Source | Float | 1 | x y z | object center |
| rot | Final | Float | 3 | x y z | (0 0 0) |
| rot_src | Source | Float | 3 | x y z | object center |
| move | Final | Float | 3 | x y z | – |
| offset | Source | Float | 1 | y | – |
Scale
Scaling only works for all axes at once atm. So if you want to scale something on the X axis only, it won’t work (yet).
scale_src 1.25 this will scale the source object by 1.25
Rot
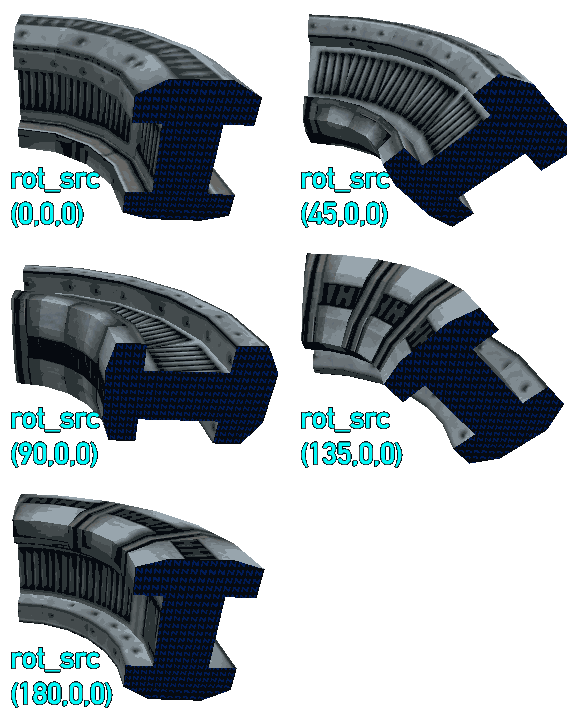 Rotating source objects is the only transformation that needs consideration at the moment, since I haven’t yet fixed a case, where rotated meshes won’t match their original shape. This applies to complex brushes (pipes), but can also concern simpler brushes.
Also rotating the object wrong, will of course lead to an invalid source brush. In the end it has to match the usual source brush restrictions of course!
rot_src “-90 0 180” this will rotate the source object around the given axes
Axis order
The rotation order of the axes is: (X Y Z). This has to be considered, when looking for specific results.
Rotation direction
A positive value means the object is being rotated counter clockwise. Sometimes this appears to be fishy though. I won’t guarantee anything atm!
Move
Moving only applies to the final curve object, as theres is the “offset” setting for the source object already and moving that along the X or Z axis wouldn’t really make sense anyway.
Example: Transformation Compositions
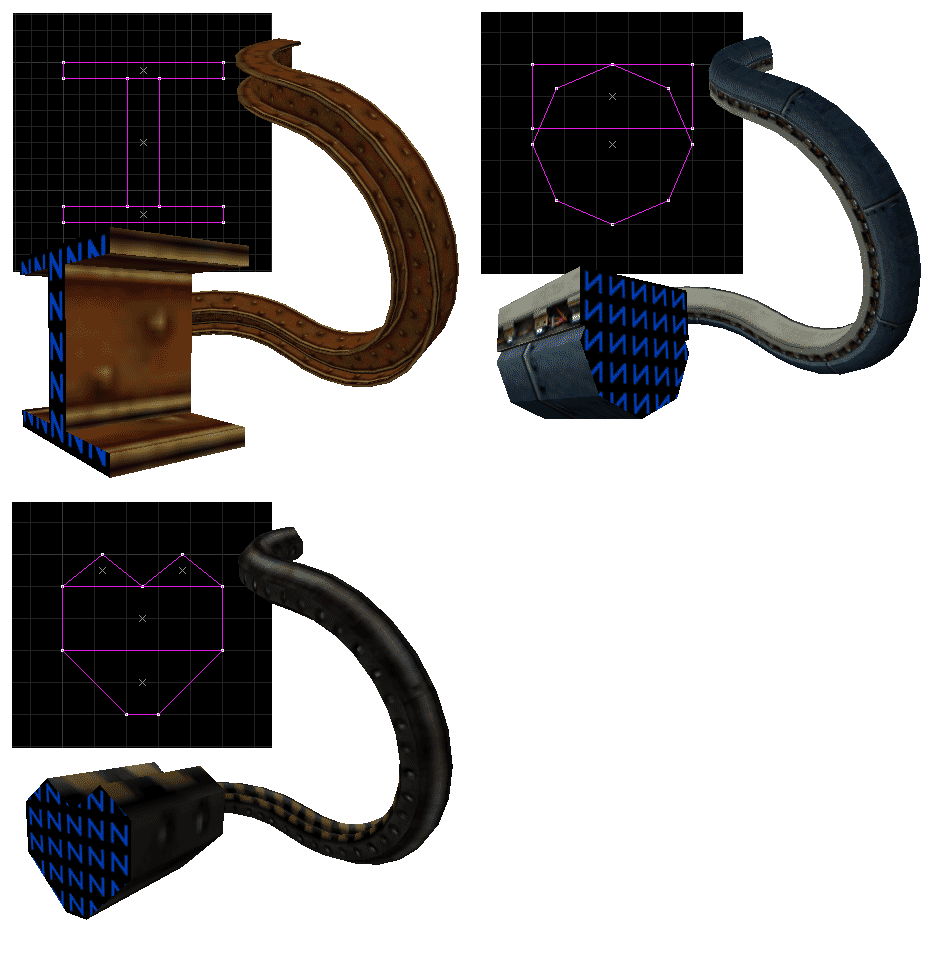
With all the transformations combined, you can create compositions. By that, once done, it is possible to reduce the generation process for specific setups a lot, as long as the dimensions of the source object stay the same.
All of the final curve objects in this example were generated from the same setting file. This works, as they all share the same size.
Notice how there’s only 1 value necessary, if the other 2 axes are not to be transformed.
Also, instead of arranging the objects extensively by rotation and movement, they are just being exported partly.
rad 0
rad 0
res 24
shift 5
bounds 0
rot_src 0 first object won’t be rotated
rot_src 90 second object will be rotated by 90 degree around the X axis
rot_src 180 third object by 180 degree around the X axis
move 0
move “-48 0 640”
move “592 0 592”
rot 0
rot “0 90 0”
rot 0
range_start 0
range_end 25
range_start 25
range_end 75
range_start 75
range_end 100
Bounding Boxes
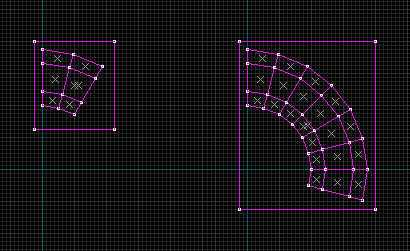 Bounding boxes are NULL brushes that enclose the final generated curve object entirely and are snapped to a grid size of 32.
This makes it a lot easier to modify (transform) the object in an editor later, since transforming objects with floating point coordinates in a map editor might lead to unclean coordinates altogether. This can be prevented by using clean bounding boxes.
Export Range
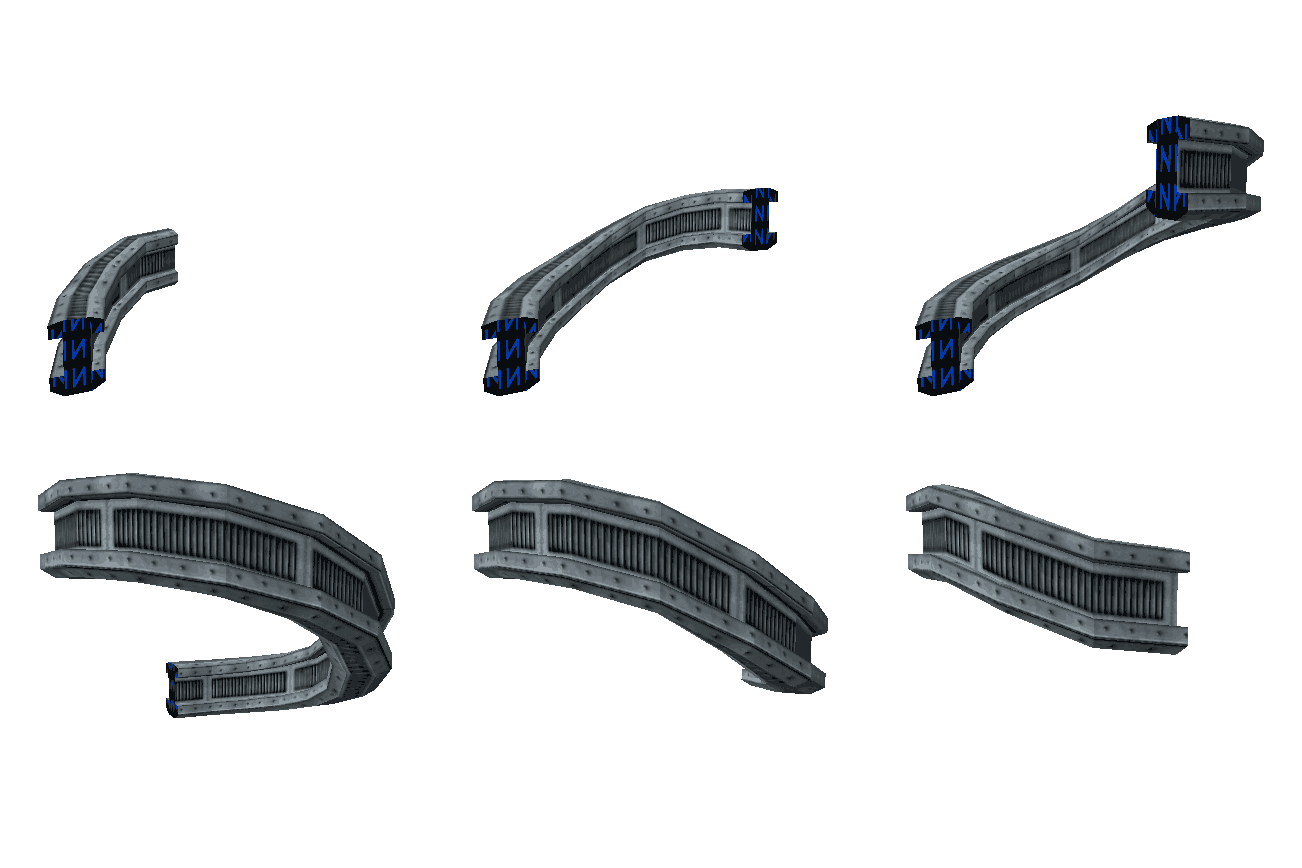 The export range can be used to only export a certain percentual amount of the final curve object.
It will also have an effect on smooth ramp generation as you can see in the image.
range_end 66.66 the last section that is considered to be exported
Percentual values example
Let’s say you have a 24 sided curve and you only ever want to export the second quarter of it, then the range values would need to be 25 for start and 50 for the end range.
Transition
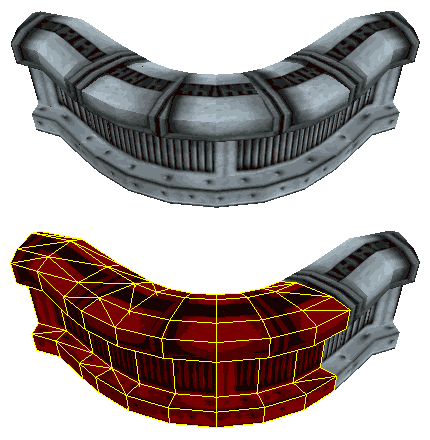
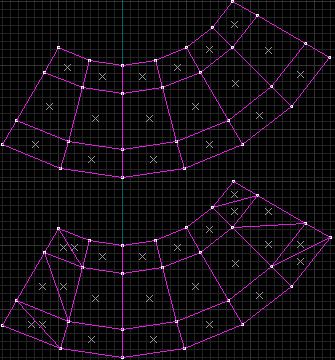 Transitions make it easier to combine different curve objects later on and also make it possible to modify the first and last section brushes in a way, that Map2Curve doesn’t support, like vertex manipulation.
Since the remaining sections of the curve aren’t concerned by this, they will keep their floating point advantages, meaning they don’t need to be triangulated or rounded, just so you are able to connect the curve seamlessly to another.
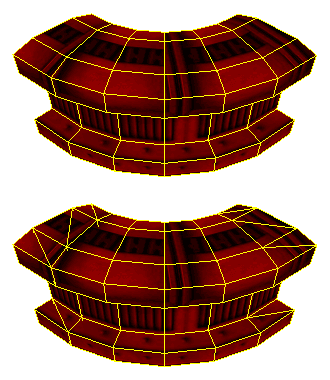
transit_round 1 cut face coordinates of first and last brush of a curve will be rounded
Combining various curves to create complex objects
Transitions help create interesting complex objects while still being able to save some file space and polygones.
Gap-Brushes
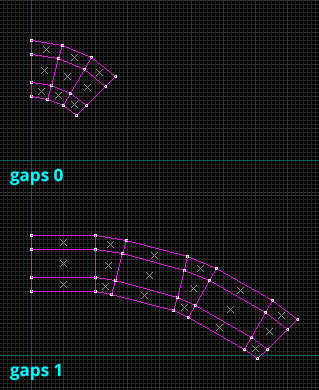 Gap brushes simply are brushes between the regular generated curve brushes, that do not follow the curve construction rules and are thus not bound by the disadvantages that come with those. They are completely straight and can be used to connect curve brushes, for example over long distances to save polygones.
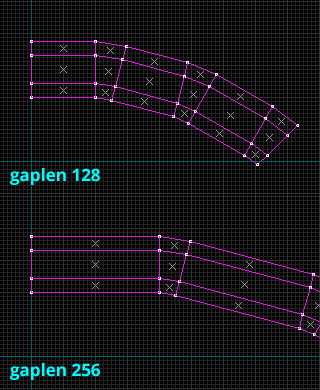 Their length can be controlled with the “gablen” setting.
gaplen 192 controls the length of the gap-brushes
Skip NULL Brushes on Export
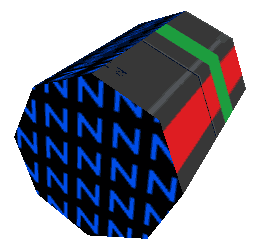
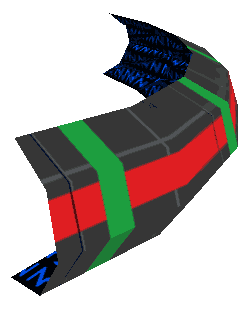 This lets you skip certain brushes on file export. NULL brushes occour, when triangulating complex brushes. Faces with a NULL texture will be turned into a brush that consists only of NULL textures and is thus not serving any purpose. It will use a lot of file space and might even have an impact on the compilation process though!
This is why it is better to to just ignore these brushes on file export entirely.