Preamble
Valid Entity Types
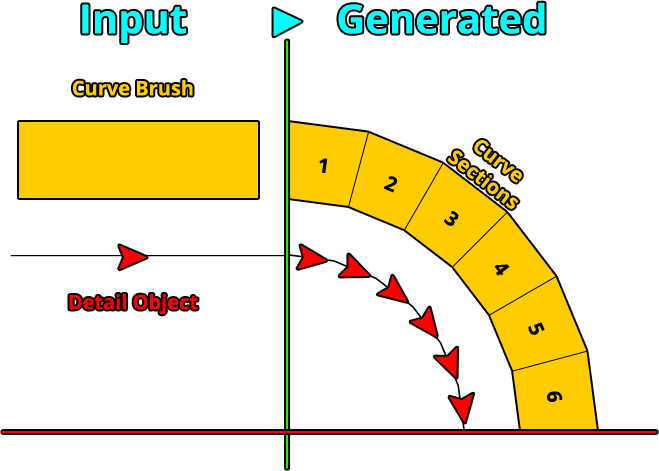
Any solid or point entity can be a detail object.
Behaviour
Detail objects will be treated differently from curve brushes. They are being left as they are and will only be moved and rotated according to where their curve section is heading.
Amount
Each detail object that is defined will be copied once for each curve section. For more objects per section there have to be more detail objects in the inputfile.
Custom Origin
Detail objects can be given a custom origin point, which can be “ORIGIN” textured brushes or a special point entity, an info_target with targetname “ORIGIN”. Giving a detail object a custom origin can make sense for correct placement and random scaling.
1. Add Detail Objects to your Scene
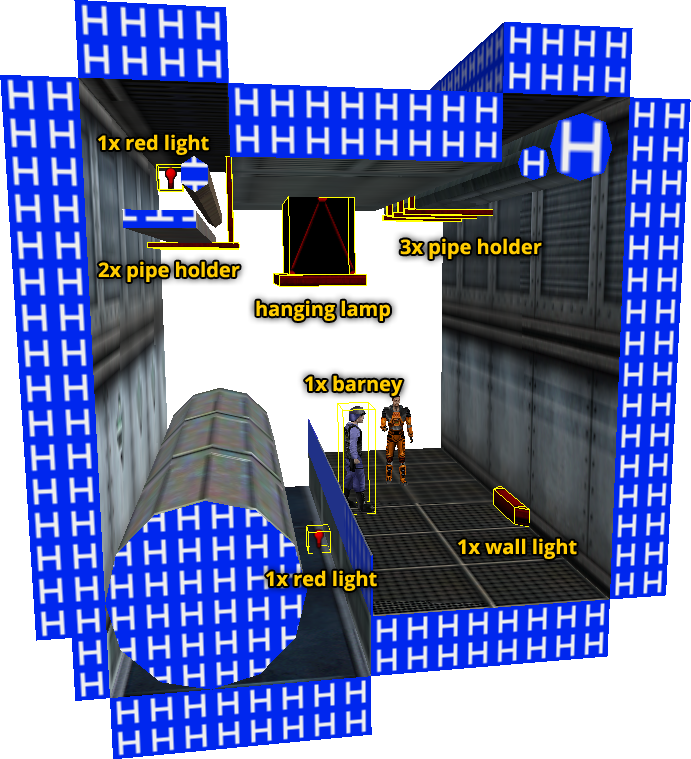
For this tutorial I will use the scene from the basic tutorial “How to create a simple Curve” and add a few detail objects to it.
Since any entity type can be a detail object, I add several lights, metal girders, lamp-brushes and a NPC.
Since the outer diameter of the curve will be wider as the inner one, I use 3 “pipe holders” there instead of only 2.
2. Defining Detail Objects
Detail objects are being defined by adding a groupname-keyvalue to each of the entities that are supposed to be a part of that detail object.
- Select all entities that are supposed to be a part of one detail group.
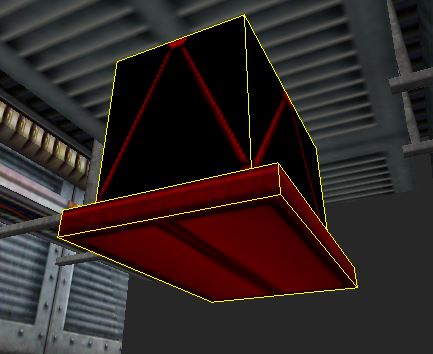
In this example the hanging lamp consists of two entities, a func_detail and a func_illusionary. Both are supposed to be treated as one (detail) object. - Open the properties dialog (ALT+ENTER), leave SMART EDIT mode (if active) and click add to add a new keyvalue.
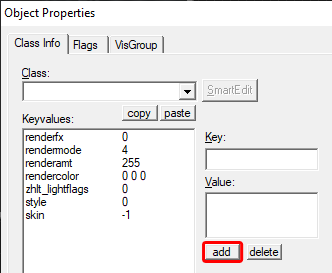
- Enter the key
m2c_d_groupand a unique name for this group as value, e.g.HangingLamp.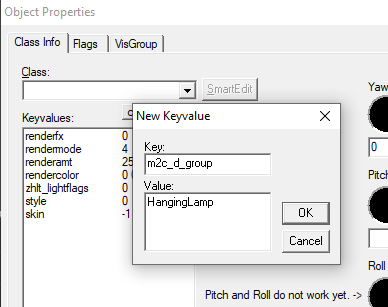
You have defined a detail object. You can leave it as it is or continue to modify its settings. Otherwise M2C will use the default settings for detail objects on it.
FYI: To make definition of many detail objects easier and faster, select all entities and add the key “m2c_d_group” to all of them at once. Then you just need to care for unique groupnames afterwards.
2. Modify Settings of Detail Objects
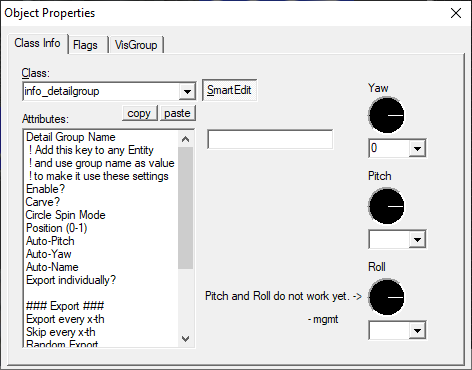
Detail objects can be modified with an info entity named info_detailgroup.
- Create an info_detailgroup entity anywhere in the scene.

- Open the properties dialog.
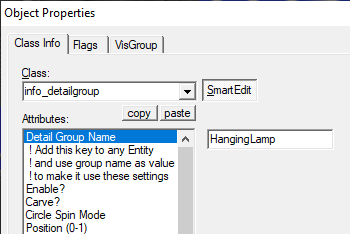
- Head to the field “Detail Group Name” and enter the groupname you gave the respective detail object in the previous step (e.g. “HangingLamp”).
- Edit some settings.
For example you can edit the position of the detail object on the respective curve section, which is given as a relative value (0-1). The default is 0.5 which is the middle of the section.
ATTENTION: If you ever want to use a “0” as value, you will have to use “-1” instead, since the MAP format export probably won’t include “0”-values.
There are many possible modifications, also random ones that modify the object within certain limits to add a large amount of variation to yaw, pitch, position and scale.
3. + 4. Export and Generation
The export and generation process don’t differ from the last tutorial. Just export your scene to map file format and use the map (or the preset file of you have one) with Map2Curve.
5. The Result


Further Informations
There are much more settings to influence the generation of detail objects.
Check out the online documentation and Readme.txt for more information about this topic.