Preamble
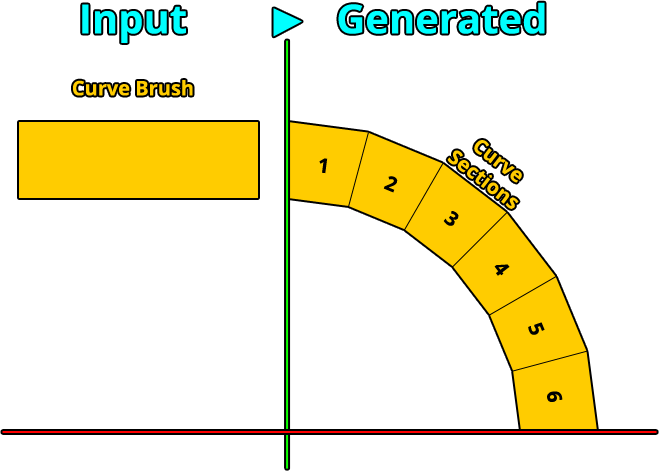
This tutorial demonstrates the simple framework construction method. Brushes of an input file are simply being extruded based on splines, e.g. the Pi circle (see picture). Custom splines are possible as well.
Textures
Texture aligns, scales and shifts are being preserved.
Precision
Resulting brushes will be partly off grid. This can be adressed by snapping the generated mesh to grid (aka round vertex coordinates).
Number of Sides
The number of curve/arc sides ranges from 4 to 384 and depends on the chosen spline type.
Spline Type
There are a few spline types that can be used with Map2Curve, Pi Circle being the simpliest and “Grid Circle” rather being one for special occasions.
Custom splines are used by linking an additional map file to the scene, which contains a series of path_corner entities, preferably made with the Path Tool of a Goldsource editor.
Linking WAD files
For texture shifts to be calculated correctly, M2C needs to know the texture dimensions. These can be extracted from Goldsource WAD files, but you need to tell M2C the exact WAD locations first. Otherwise it will use a default texture size of 128*128.
- Head to the “WAD” folder in M2Cs root directory.
- Open the file “WADList.txt”:
- Add the absolute paths and filenames of the WAD files you normally use for Goldsource mapping, e.g.:
C:\SteamLibrary\steamapps\common\Half-Life\valve\halflife.wadC:\SteamLibrary\steamapps\common\Half-Life\valve\xeno.wad
…etc…
- Alternatively you can also paste copies of your WAD files into the WAD folder:
2. Create a Scene
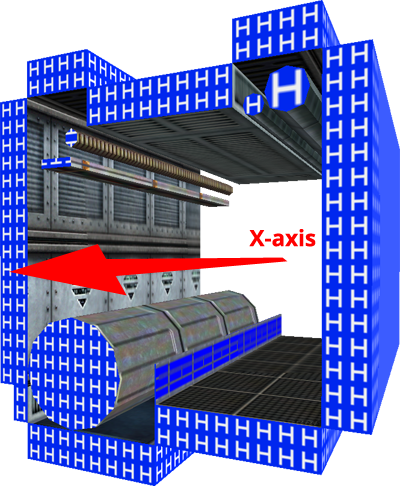
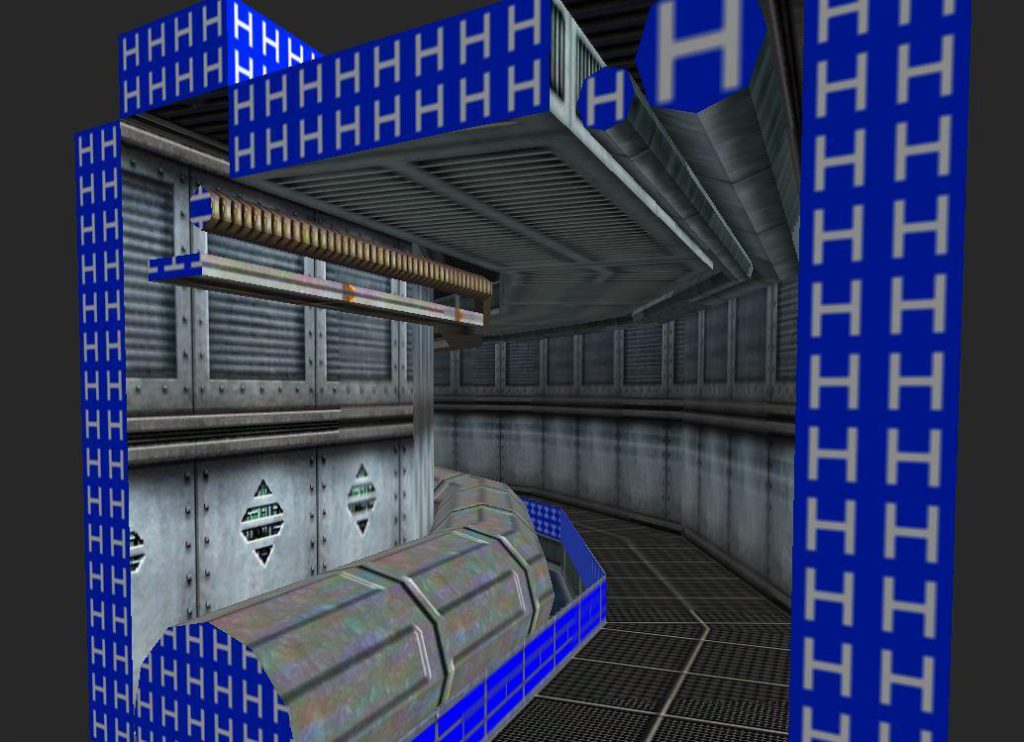
Let’s assume you have a simple scene with continuous brushes like this and want to have a curved version of it.
Be sure to align all brushes along the X-axis and have the cutting faces (the ones with the H-Texture) planar! Brushes can be world or solid entity.
NOTE: As grouping isn’t supported for the final file currently, it is advised to turn any brush into a solid entity, since this will effectively group the generated brushes together.

3. Create Curve Settings
A) Using a Presetfile
Presetfiles are plain text files that contain settings for M2C.
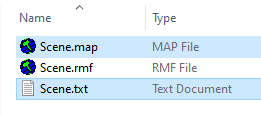
- Create a textfile and give it the same name as your mapfile.
- Open the textfile and add the following text to it:
rad 0        // radius (“0” will use the original position as radius)
res 16       // how many sides the curve will have
offset 256   // additional units on top of radius
range_end 25 // end of curve export range in percent
FYI: The only command that is actually necessary here, is theradcommand. It corresponds to one curve object. For more curve objects to be generated you need to add moreradcommands. - Save your changes.
B) Using info_curve Entity
The info_curve entity is a point entity for Goldsource editors that contains all the settings for M2C.
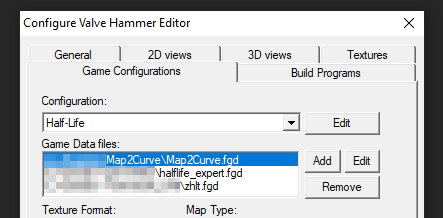
To use this, add the Map2Curve.fgd file (located in the M2C root directory) to your Goldsource editors game configuration.
- In your scene create an info_curve entity.
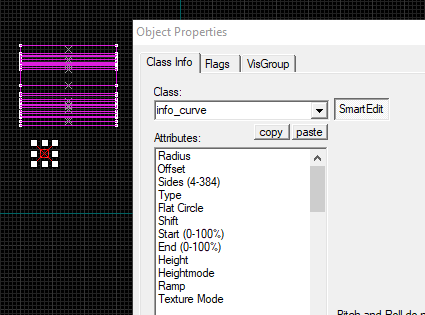
- Edit some settings.
FYI: You don’t need to modify or create any settings for a curve to be generated later, except the rad command in a presetfile.
M2C uses default settings in that case. All you do when using your own settings is overwriting the default ones.
4. Export the Scene to MAP Format (Goldsource)
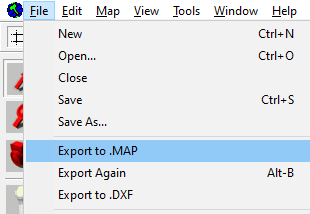
Currently the Goldsource MAP format is the only possible input format for Map2Curve.
It can be processed in different ways.
5. Generate a Curve
No matter which method for the settings you used (presetfile or info_curve entity), you can use any of the files you created (mapfile or presetfile) with the Map2Curve executable. Always use either the one or the other, not both at the same time (since this will only do the same thing twice).
A) Drag & Drop
Just drag and drop the file(s) you want to process onto the M2C executable. Usually your working files will be in another directory, so you can either create a shortcut of the EXE or rightclick on the file you want to generate and chose “open with”, to open the file with M2C remotely.
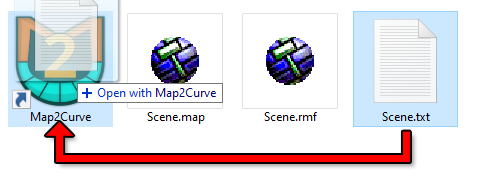
Either use the presetfile to generate the curve, or…
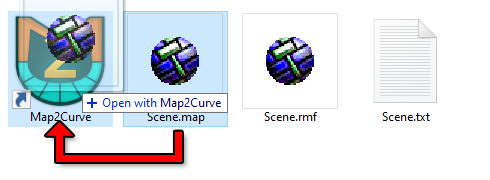
…use the map file that is associated with the presetfile.
B) CMD Console
Open up a command console.
Change the path to the M2C root directory, e.g. like this:
cd /d C:\Map2CurveTo open the presetfile or mapfile with M2C enter the following:
Map2Curve_x64.exe <YOUR_WORKING_DIR>\Scene.mapThe file path to your working files can be relative or absolute, depending on where the files are located.
6. The Result
The resulting RMF file can be opened and modified in any Goldsource editor.
Consider that the generated brushes usually will have floating point coordinates in them, meaning that some of their vertices are not on grid.
Further Informations
There are much more settings to influence the generation process and result.
Check out the online documentation on http://gibshooter.com/Map2Curve/documentation and Readme.txt for more information about this.
How to add more detail
The default way curves are being generated is by first taking the “cut surface” of the input mesh and then extruding it along splines (e.g. Pi circle by default), which are creating a construction framework for the curve brushes.
Since this is a very rigid method of construction, only linear brushes without any complex details can be used as an input source.
To add details like models, lights, lamps, etc., please see my other tutorial on how to work with detail objects.
Since version 0.7 you can also create carved circle duplications of an input scene, which enables you to have any amount and kind of detail in the final curve object, theoretically.