New Game Data File (FGD) and info-Entities
These 3 entities are the first alternative for creating presets manually using text-files ( e.g. MyMapname.txt ). They are placed directly in the map file that stores your source brushes and entities, which you want to turn into a curve object.
They can do about anything that would usually be done with preset files.
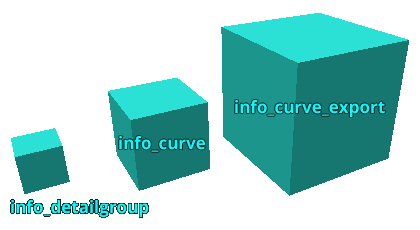
info_curve
This entity acts as a preset file for the current map. There can be more than one of these in a map file, just like there can be more than one curve object defined in a M2C preset-file.
Be aware that only keyvalues that were set (have a value different than “0”), will usually be exported by an editor like Hammer!
info_curve_export
This entity can be used to specify only the export relevant settings, which are at the moment “target” (the output file) and “append”. Only one of these Entities is being recognized by M2C, as there can only be one export file.
info_detailgroup
This entity controls a group of detail objects, of which there can be as many as you want. Detail objects are a new feature in this version, with which it is now possible to take anything other than the solid brushwork of a map and precisely align it along a curve object. Currently this only works for the Pi circle construction method though.
More information on how detail objects work can be found below.
How are they used?
Well obviously the first step would be to add the Map2Curve.fgd to your current editor.

In Hammer it is done via the following menu items:
Tools -> Options -> Game Configurations -> Game Data Files -> Add.
In J.A.C.K. it is almost the same:
Tools -> Options -> Game Profiles -> Game Data Files -> Add.
Now open a map, which you want to turn into a curve and follow these steps:
- Place an info_curve entity anywhere in the map.
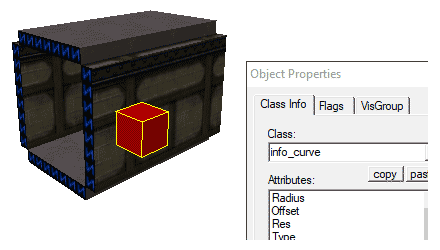
- Specify some settings (you dont need to). One info_curve entity stands for one curve object.
Note: Only settings that were changed or set can later be recognized by M2C!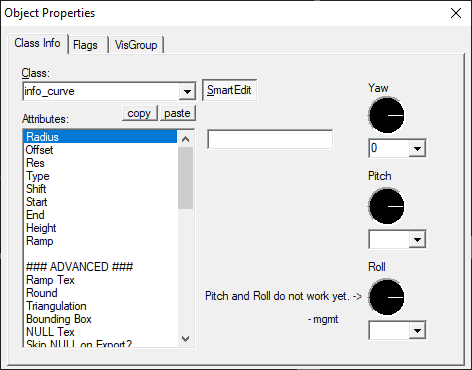
-
Safe your map file. Ah-Duhhh.
- Now just drag&drop your map file onto the M2C executable.
By the way, you can also create a shortcut and drop it onto that. There’s no difference.
The newly generated mapfile will be – if not specified otherwise in an into_curve_export entity – created in the folder where your original map file is located as well, just with an “_arc” attached to the name.
New feature: Detail Objects
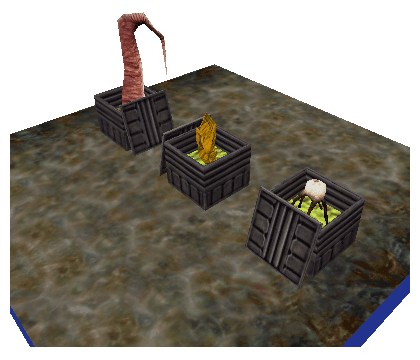
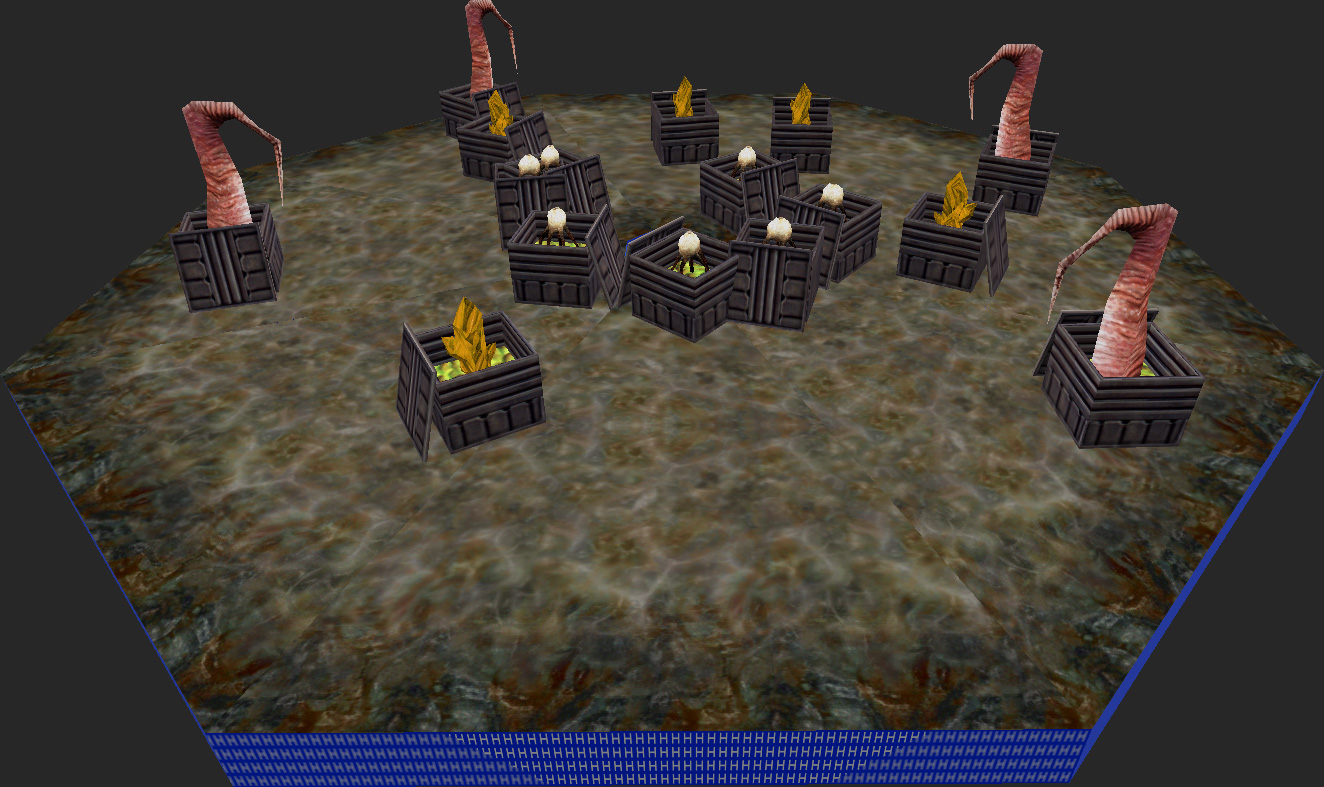
Let’s take a sample scene like the following and assume that it makes sense (which it doesn’t, but stay with me here).
The boxes are solid entities (e.g. func_wall) and their respective content is a point entity (cycler in this case).
Now to let M2C know that multiple entities are in a group, we need some kind of indicator.
Creating Detail Groups
Currently that indicator is a key-command called “m2c_d_group”, which contains the name of the respective group to which that entity belongs to.
A group indicator is being added like this:
-
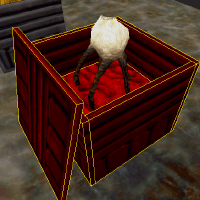
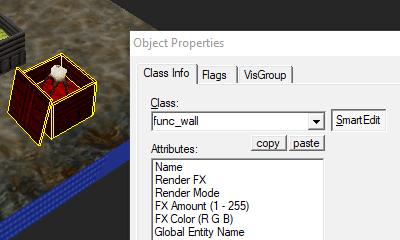
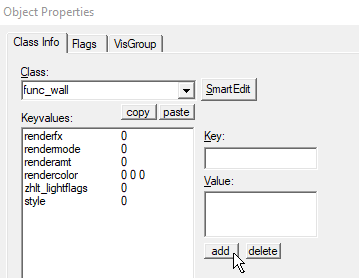
Select a solid or point entity which you want to be part of a Detail Group and open its properties (press Alt+Enter).
-
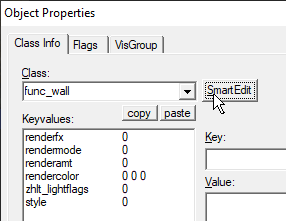
Leave “Smart Edit” mode by pressing the respective button.
-
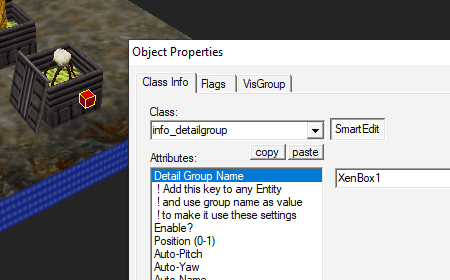
Add the key “m2c_d_group” and use a unique groupname as value.
Repeat this process for any entity you want to be part of a detail group.
TIP: Instead of adding the key to each entity again and again, just select all relevant entities and add it to all of them at the same time. Then you just need to care for the respective groupnames afterwards. It will save you a lot of time.
Result
If the upper example is being generated, it will look somehow like this:
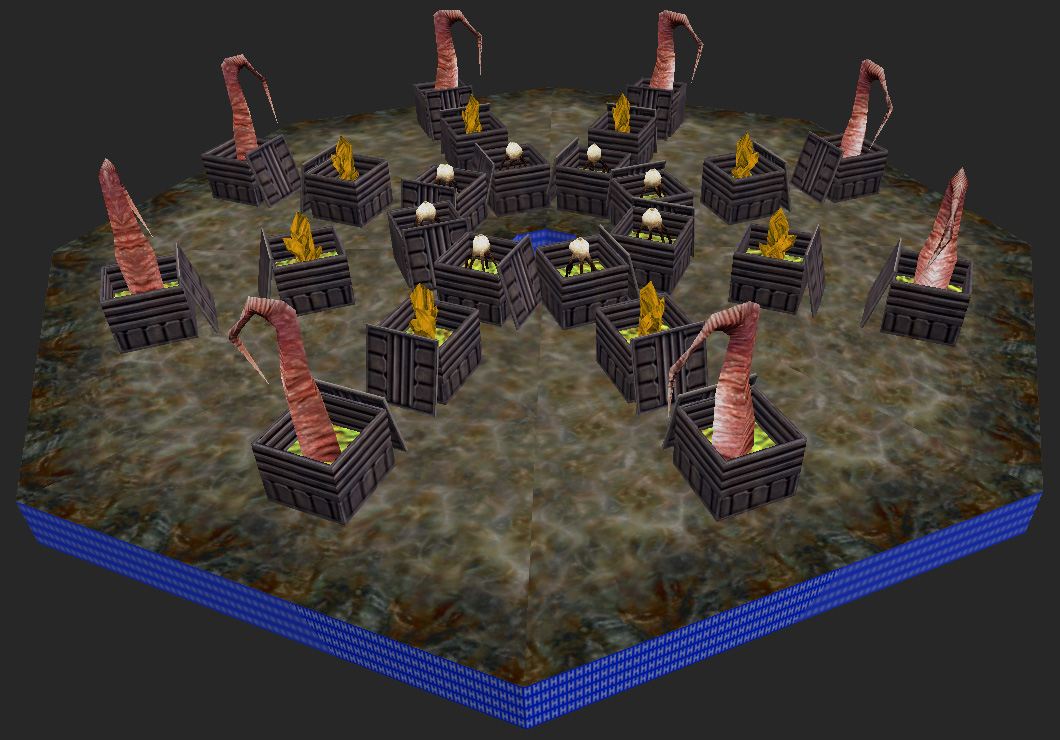
Without further configuration, detail objects will be automatically aligned and rotated along the respective curve object in a simple manner.
If you want to add any variation, you will need to add some settings to the relevant detail group.
Modify Detail Group Properties
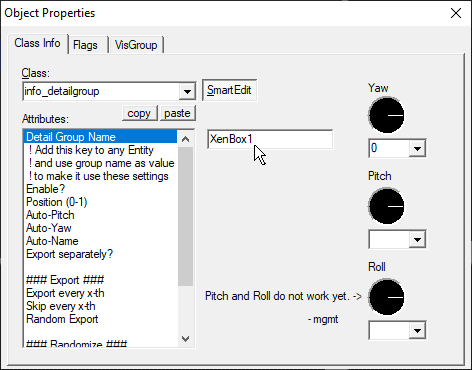
To give each detail group its own settings, there are different ways. The easiest is to use one of the new entities: info_detailgroup. The other is adding the needed commands directly to the entity, just like you already added the groupname using the key “m2c_d_group”.
The following commands can be used to modify detail groups:
| Command | Data Type | Default Val | Range | Description |
|---|---|---|---|---|
| General settings | ||||
| d_enable | Integer | 1 | 0/1 | Turns this Detail Group on or off entirely. |
| d_pos | Float | 0 | 0-1 | Controls the relative position of this DG along the curve section. |
| d_autopitch | Integer | 1 | 0/1 | Turns automatic Y axis rotation (Pitch) on or off. |
| d_autoyaw | Integer | 1 | 0/1 | Turns automatic Z axis rotation (Yaw) on or off. |
| d_autoname | Integer | 0 | 0/1 | Turns automatic numbering of target and targetname keyvalues on or off. |
| d_separate | Integer | 0 | 0/1 | Turns individual export of solid entities (brushes) on or off. |
| Randomize Y/X-Position and Z-Rotation | ||||
| d_movey_rand | Int/Float | 0 -32 32 | 0/1 min max | Moves objects along Y axis randomly within range. |
| d_rotz_rand | Int/Float | 0 180 -180 | 0/1 min max | Turn objects around Z axis (Yaw) randomly within range. |
| d_pos_rand | Int/Float | 0 0 1 | 0/1 min max | Randomizes position of objects along section within range. |
| Control/Randomize Export | ||||
| d_draw | Integer | 0 | x>0 | Export every x-th element of this group. |
| d_skip | Integer | 0 | x>0 | Skip export of every x-th element of this group. |
| d_draw_rand | Integer | 0 | 0/1 | Completely randomize the export of this groups elements. |
Notice that if you add command-keys to entities manually in an editor, they always need the prefix “m2c_”!
Modifying Detail Groups using info_detailgroup Entity
Using the entity info_detailgroup with the respective groupname, is an easy way of modifying detail groups individually.
-
Create an info_detailgroup for a specific detail group.
- Give it the same groupname as the detailgroup you want to modify.
- Edit some settings…
Result (different settings than the above!)
In this example I mostly used random settings. As you can see the outcome can be chaotic and demands manual adjustments most of the time, but don’t blame me! This is just what you get for the joy of randomness.
Exception: Single Point Entities
Single point entities that would be their own group and don’t need special individual configuration, can be left as they are (no groupname keyvalue needed here).
They will be assigned unique groupnames by M2C automatically and will then be processed based on the global settings for detail groups.
The reason why this isn’t possible with solid entities as well is, that those can’t automatically be distinguished by M2C into curve brushes and detail brushes (because how would it do that?).
New Feature: M2C reads WAD3 files
Map2Curve is now able to obtain texture information directly from your WAD files. For this to be possible you can chose between 2 methods:
Reading WAD files:
- Open the WADList.txt in the WAD folder and add your WAD file paths (one per line).
- Alternatively you can paste copies of your WAD files into the WAD folder.
New commands: nulltex, spike_height
nulltex Command
 The nulltex command simply defines the texture that is being used for faces which originate from triangulated brushes. It does NOT change any existing NULL textures!
spike_height Command
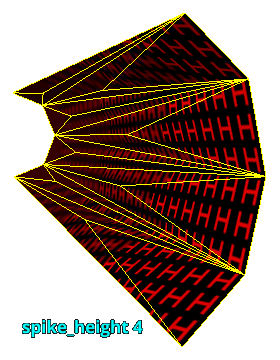
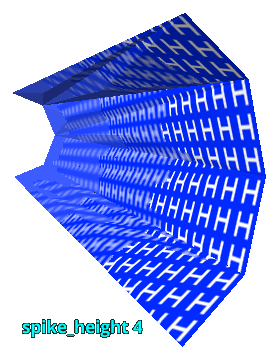 The spike_height command controls the height of spike brushes, that occour when a complex brush is being triangulated and turned into many spike-shaped brushes. In some situations it is necessary to use smaller heights for these spike-brushes.
New: Settings Priority
M2C uses different sources for its settings, the most basic ones being those that are defined within its source code, referred to as internal defaults.
For most situations there is now a specified order that defines which source is being used for obtaining settings, when the superior wasn’t found.
For Map-Files (*.map)
- Map-internal info_curve entity (if existing)
- External preset-file (*.txt) (if existing, valid and not empty)
- Default settings (DEFAULTS.txt) (if existing, valid and not empty)
- Internal defaults
For Preset-Files (*.txt):
- External preset-file (*.txt) (if valid and not empty)
- Default settings (DEFAULTS.txt) (if existing, valid and not empty)
- Internal defaults
Various Changes
Axis Order of Rotation
The axis order of all relevant rotations (rot and rot_src) changes from (Z X Y) to (X Y Z).
Submitting Transformations via Preset Files
The way how to submit rotation values via preset files from 90,45,135 to “90 45 135” (quotation marks!).
DEFAULTS.txt now works as intended
The Defaults.txt now works as a basic source of default settings and is loaded at the very beginning. Anything that isn’t specifically submitted by the user via preset files or info_curve-entities, is being taken from here now.
This differs from the previous behaviour where the defaults.txt only applied to map-files, that were dropped onto the M2C-exe.